Get 방식과 Post 방식의 차이와 스프링 부트에서의 처리 방식
Get과 Post는 HTTP 프로토콜을 통해서 서버에 어떤 값을 전달할 때 사용하는 방식의 종류이다.
( 어떻게 전달하냐에 차이가 존재한다. )
URL에 파라미터 값으로 데이터를 전달하면 Get 방식이고, Post 방식은 URL에 파라미터 정보가 보이지 않는다.
그 이유는 데이터가 Request Body에 포함되서 전달되기 때문에 파라미터가 노출되지 않는다.
1. Get 방식과 Post 방식의 특징과 장단점
ⓐ 기본적으로 Get 방식은 조회 이용시 많이 사용되고, Post 방식은 입력(생성), 수정, 삭제 시 많이 사용된다.
→ 검색의 주소 결과나 링크로써 사용되는 경우라면 Get 방식이 많다.
→ URL에 파라미터 정보가 노출되고 당연히 전달되는 데이터 값들도 노출되기 때문에 보안적인 측면에서는 안좋다.
ⓑ Post 방식은 값을 숨겨서 전달할 수 있다. SSL 사용시 높은 보안 수준을 적용할 수 있다.
→ URL에는 정보를 담을 수 있는 한계가 있고 이런 경우는 Post 방식을 사용하면 된다.
ⓒ Get 방식은 캐시가 남아있고, 브라우저의 히스토리에 파라미터 정보가 저장되어서 좋지 않을 수 있다.
반면에 Post 방식은 캐시가 남아있지 않고, 히스토리에 정보가 남지 않는다. 그러나 캐시 덕분에 속도적인 측면에서는
Get 방식이 Post 방식보다 좋다.
ⓓ Post 방식은 바이너리 데이터도 전달이 가능하기 때문에 파일 업로드 등을 처리하기 위해서는 Post 방식을 사용한다.
즉 기본적으로 조회 등을 처리할 때는 Get 방식을 많이 사용하고, 입력, 생성, 수정, 삭제 등을 Post 방식으로 많이
사용한다. ( 절대적인 것은 아님 )
2. 스프링 부트 프레임 워크에서의 처리 방식
ⓐ Get 방식 : @GetMapping() → @RequestParam
ⓑ Post 방식 : @PostMapping() → @RequestBody, @RequestParam
@RequestBody의 경우는 들어온 데이터가 여러개 일지라도 일괄적으로 묶어서 받을 수 있지만 @RequestParam일
경우는 들어온 데이터들을 개별적으로 각각 처리하는 방식으로 받는다.
PostMapping
1. form의 action 값과 Controller의 PostMapping에 전달되는 값이 같아야한다.
package com.example.capstone.controller;

import org.springframework.stereotype.Controller;
import org.springframework.ui.Model;
import org.springframework.web.bind.annotation.PostMapping;
import org.springframework.web.bind.annotation.RequestBody;

@Controller
public class LoginController {

    @PostMapping("/login")
    public String login(@RequestBody String req, Model model){

        // Post로 전달된 데이터를 RequestBody로 받아서 req에 넣어준다. 즉 데이터는 req가 가지고 있다.
        // 뷰페이지로 값을 전달하기 위해서는 model을 사용한다.
        model.addAttribute("req",req);
        System.out.println(req);

        return "/main/main.html";
    }

}
<!DOCTYPE html>
<html lang="en">
<head>
<meta charset="UTF-8">
<title>Title</title>
</head>
<body>
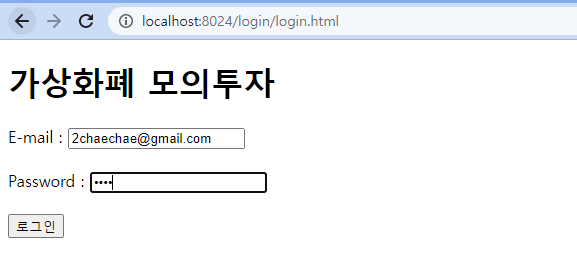
<h1>가상화폐 모의투자</h1>
<form action="/login" method="POST" target="_blank">
<!-- label을 설정해주면 E-mail을 클릭하면 해당 input의 커서가 깜박거린다.-->
<label for="userEmail">E-mail : </label>
<input type="text" id="userEmail" name="userEmail"><br><br>
<label for="password">Password : </label>
<input type="password" id="password" name="userPassword"><br><br>
<input type="submit" value="로그인">
</form>
</body>
</html>


2. @Requestbody는 전달된 데이터를 일괄로 묶어서 출력한다. Post 방식으로 전달한 Form 데이터에 대해서
개별적으로 처리하고 싶은 경우에는 @RequestParam을 사용해야한다.
하지만 @RequestParam를 사용할 때는 form에서 전달된 각각의 name들과 Post 방식으로 전달된 form 데이터에
대해서는 일치를 시켜줘야한다. form에 대해서 각 input에 name을 명시해줬다면 @RequestParam의 파라미터와
이름이 같아야한다.
package com.example.capstone.controller;

import org.springframework.stereotype.Controller;
import org.springframework.ui.Model;
import org.springframework.web.bind.annotation.PostMapping;
import org.springframework.web.bind.annotation.RequestBody;
import org.springframework.web.bind.annotation.RequestParam;

@Controller
public class LoginController {

    @PostMapping("/login")
    public String login(@RequestParam String userEmail, Model model){

        model.addAttribute("userEmail",userEmail);
        System.out.println(userEmail);

        return "/main/main.html";
    }

}
* @RequestParam이 단일 파라미터를 받는 경우는 value 옵션을 명시안해줘도 된다.
<!DOCTYPE html>
<html lang="en">
<head>
    <meta charset="UTF-8">
    <title>Title</title>
</head>
<body>
    <h1>가상화폐 모의투자</h1>

    <form action="/login" method="POST" target="_blank">

        <label for="userEmail">E-mail : </label>
        <input type="text" id="userEmail" name="userEmail"><br><br>
        <label for="password">Password : </label>
        <input type="password" id="password" name="userPassword"><br><br>

        <input type="submit" value="로그인">
    </form>

</body>
</html>
* label의 for에 들어가는 속성값은 input의 id 속성이다.
<!DOCTYPE html>
<html xmlns:th="http://www.thymeleaf.org">
<head>
    <meta charset="UTF-8">
    <title>Title</title>
</head>
<body>
    <h1>가상화폐 모의투자 서비스입니다!</h1>

    <h1 th:text="${ userEmail } + '님 로그인 성공!'"></h1>
</body>
</html>

'Back-End > Spring Boot' 카테고리의 다른 글
| [ Spring boot ] DTO 객체 및 폼과 뷰페이지 ③ (0) | 2022.05.08 |
|---|---|
| [ Spring boot ] DTO 객체 및 폼과 뷰페이지 ② (0) | 2022.05.08 |
| [ Spring boot ] DTO 객체 및 폼과 뷰페이지 ① (0) | 2022.05.07 |
| [ Spring boot ] Spring boot 프레임워크 ② (0) | 2022.04.30 |
| [ Spring boot ] Spring boot 프레임워크 ① (0) | 2022.04.13 |


